Setting up a PHP Server
Demo starter files
In this demo we're going to set up a basic server for running PHP on your computers. Then we'll walk through the process of separating the common elements of each page into separate "include" files.
There are two ways to run a PHP server - natively in macOS, or using a program called MAMP. We will run PHP alone for today, but in the future you may want a more full-featured setup like MAMP.
macOS
If you're running windows, skip to the next section. You'll need MAMP, which also has a windows version.
PHP is already installed on all Macs since OS X 10.9 (Mavericks).
We'll need to venture back into Terminal to get it running, but the commands are very simple. We can even make any folder into a document root (www) folder!
Type or copy and paste the following commands exactly as they appear.
- Open up Terminal.app by searching for it in Spotlight.
- Type
cd, then a single space, but do not hit Enter yet.cd
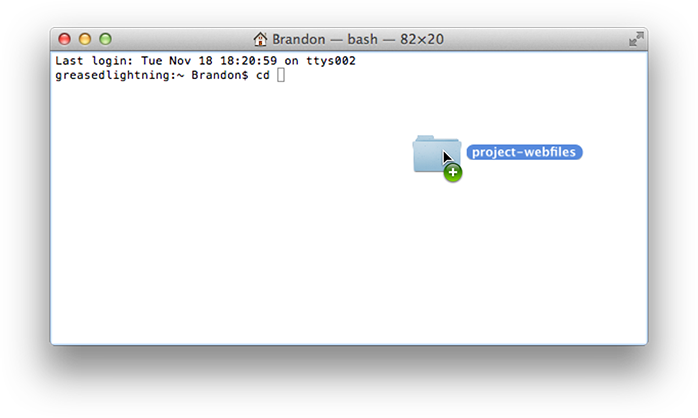
- Now drag your project folder onto the terminal window. This should type the path to the folder on the command line for you.

- Now hit Enter. This is the command for change directory.
- Finally, start the PHP engine in this folder by typing
php -S localhost:8000and hit Enter.php -S localhost:8000
- If the folder you're using has an
index.htmlfile, you should now be able to visit http://localhost:8000 to view the page.
PHP is now running locally on your computer, through virtual port 8000. Normal HTTP web traffic uses port 80, and we don't want to hijack our regular internet connection while the server is running. Many ports have dedicated uses, so you can't choose any arbitrary number. You are however, safe to use ports 8000, 8080, or 8888... whichever you find easiest to remember.
The PHP server will die when you close the Terminal application, so leave Terminal open while you're working. You may see log messages popping up and this is normal.
When you're finished working, type CTRL+C to kill the PHP server, then quit Terminal.
MAMP
WAMP, LAMP, XAMPP, AMP.
MAMP is a free software suite that makes setting up a full "AMP stack" on your computer dead easy. MAMP stands for
Macintosh,
Apache (our web server)
MySQL (a database engine) and
PHP (our scripting language)
If you're installing MAMP, go ahead and grab a copy from their web site. The download is large, so it may take a little while.
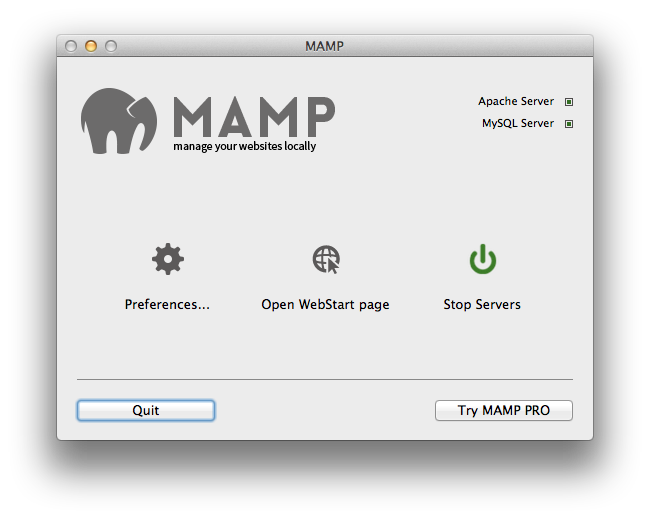
Here's what it looks like after it's installed, when you start it up:

- By default the document root (
wwwfolder) for MAMP is in:MacintoshHD > Applications > MAMP > htdocs
You can change this in MAMP's preferences, or create an alias (shortcut) to thehtdocsfolder. To create an alias, highlight the folder in Finder and pressCMD+L, orCMD+OPT+dragthe folder where you want to put the shortcut. - To view your web site files in the
htdocsfolder, open your browser and visit http://localhost:8888. MAMP uses port 8888 by default.
MAMP is completely self-contained and does not alter any of your system settings. To uninstall MAMP, all you have to do is delete the MAMP application folder! The uninstall process should be very similar on Windows.
Viewing Your Project
Starting the PHP server using either of these methods will not turn your computer a publicly visible web server. Everything is still happening offline, safely behind your network's firewall. Don't worry about security, or anyone outside of your network being able to see the files on your computer.
Using either method, you can view your project files by visiting http://localhost:<portnumber>.
Localhost is the builtin shortcut for the loopback address (your own computer), and we're running PHP on a non-standard port to avoid any conflicts with other programs. localhost is also sometimes shown as 127.0.0.1.
Finally... PHP
Converting to PHP
All you need to do is change your file type from .html to .php. I'm not kidding, you now have a (very boring static) PHP script.
You can weave between regular HTML and PHP as many times as you want in the same document. HTML is written as normal, and PHP goes between these tags: <?php and ?>.
Includes
With HTML in a browser, pages are downloaded and read line by line for rendering on the page.
When the browser gets to a line that calls for an external file (like a stylesheet, an image, or javascript code) it sends a request and gets that file too. Then it continues on.
In this way an HTML page is read and interpreted as a single stream of data. That's why CSS rules which appear later in the document override earlier ones.
Includes in PHP allow us to link scripts together in the same way. The PHP engine reads a script file, and when it gets to an include, it goes and processes that file before coming back.
To write an include in PHP we use the require_once(); function.
<p>Here's some HTML</p>
<img src="img/rockin_illustration.png">

<?php

// DETOUR!
require_once("otherscript.php");

?>

<p>more HTML.</p>- Yup, single line comments in PHP are the same as in javascript.
- Statements also end with a semicolon just like javascript.
- Whitespace between the php tags is ignored just like javascript.
- If you plan to include the same file more than once on the same page, use
require();instead.
The term "include" comes from the include() function in PHP. This function does essentially the same thing, but require() and require_once() handle errors a little better if the file that you're pointing to is missing. You should almost always use require_once().
Have you figured out why this is useful yet? The idea is just like using one style sheet on multiple pages. We can have separate files for modular portions of our HTML, and include them on many pages!
That way, for example, you can make changes to your navigation menu or header in one place, and have all of the pages on your site point to that file.
Let's convert our demo files to PHP, and factor out some common lines of code to include files.